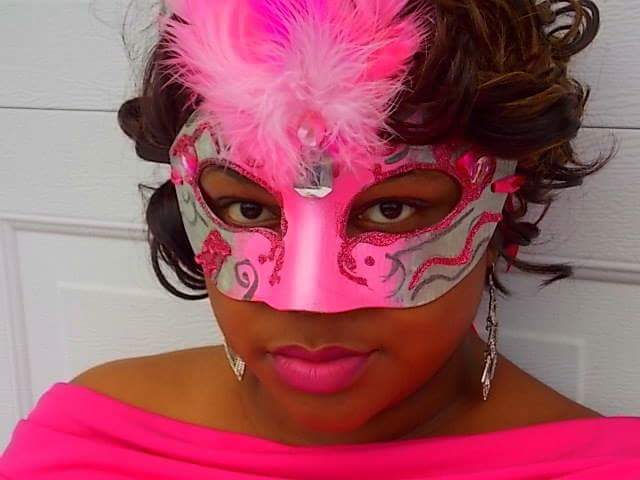
It’s all a masquerade. It feels like the adult party scene has transitioned from throwing costume parties to masquerades. Every where I look there’s a masquerade being thrown. I love a good reason to dress up and get creative! It seems like all the costume shops are selling the same assortment of masks.
My DIY masquerade mask is easy and you only need a few items to take your mask from basic to elaborate. Making your own mask opens your options you won’t be limited by what masks are available in the store. You can pick your own color combinations and go wild!
For this project you will need:
Cardboard Mask (the paint and glitter adhere to cardboard better than plastic)
Acrylic Paint
Craft glue
Ribbon that is 1/2 nch wide or wider
Rhinestones
Hot glue gun
Feathers
Glitter or glitter glue
4 Paint brushes 2 bristle, 1 foam, 1 fine tip brush
Clear coat sealer (like Mod Podge or spray clear coat)
Step 1
Select your paint colors and measure how far you want the first color to go on your mask. It doesn’t have to be perfect since you will be blending the two colors together for an ombre effect. Paint the first color with a bristle brush on your mask.
Step 2
With another clean bristle brush paint the second color all the way to the edge of the mask. You want the paint to still be wet when you move on to step three.
Step 3
Blend the two colors together with a foam brush. You may need to pick up paint from both colors since acrylic paint dries fast. Add small amounts of paint to the dry foam brush and just blend until you have your desire fade look.
Step 4
With a fine tip brush out line the eyes of your mask. You can add swirls and extra designs if desired. Just use light brush strokes to create swirls.
Step 5
For the easiest application use a glue bottle with a thin nozzle. Outline the lines of your design with the glue. Dump the glitter over the glue and shake the excess off. Once the glue has dried you can use a dry brush remove any stray glitter.
Step 6
 The best way to apply the feathers is to practice the placement before you glue the feathers together. Once you have decided how you want the feathers to lay glue them together. Place a drop of hot glue at the base of the steam and place the next feather on top. You can use a paintbrush handle to press the feathers into each other to ensure they are together. Once you have all the feathers together glue the rhinestones at the base of all the feathers. Let it all dry for about 20 minutes.
Step 7
Choose where you want to place the feathers on your mask add a drop of glue and press the cluster into the mask.
Step 8
Cut two lengths of ribbon that are long enough to go around your head. You may want to cut a few extra inches so you have enough to tie in a bow. Fold the length in half and push the ribbon through the hole until the ribbon is even on both sides and continue this same process on the other side of the mask.
Feel free to get creative! If you want more feathers or more bling add it where you want it. The best part is your mask will be one of a kind!
For more Oh Wize One be sure to subscribe by clicking the follow button. You can also follow me on Facebook OhWize One, Instagram@ohwizeone, twitter @ohwize1. Remember to share the wisdom with friends!!


Leave a Reply